 Save Pin
 My son grabbed one from the cooling rack before I could stop him, and chocolate smeared across his cheek as he grinned up at me. That was the moment I knew these weren't just treats—they were tiny celebrations wrapped in crunch and sweetness. I'd made them on a whim for his classroom party, doubling the batch because I couldn't imagine they'd last. By the time I packed them into the tin, half were already gone, claimed by curious hands and eager taste buds.
I brought a platter to a potluck once, and they vanished faster than anything else on the table. A friend pulled me aside and asked if I'd used some secret ingredient, but the truth was simpler: good butter, patience with the marshmallows, and chocolate that didn't skimp. The sprinkles were her favorite part, she said, because they made her feel like a kid again. I've been making them ever since, tweaking the toppings, testing white chocolate, always chasing that same look of delight.
Ingredients
- Unsalted butter: Use real butter, not margarine—it melts cleaner and gives the marshmallows a richer base without any waxy aftertaste.
- Mini marshmallows: They melt faster and more evenly than large ones, so you won't end up with pockets of unmelted fluff.
- Rice Krispies cereal: The classic snap crackle pop texture is irreplaceable, though you can swap in cocoa puffs or fruity cereal for a twist.
- Fine sea salt: Just a pinch balances the sweetness and makes the chocolate topping sing.
- Semisweet or dark chocolate chips: Choose a brand you'd enjoy eating on its own because that flavor will coat every bite.
- Vegetable oil or coconut oil: A teaspoon keeps the chocolate glossy and smooth instead of matte and thick.
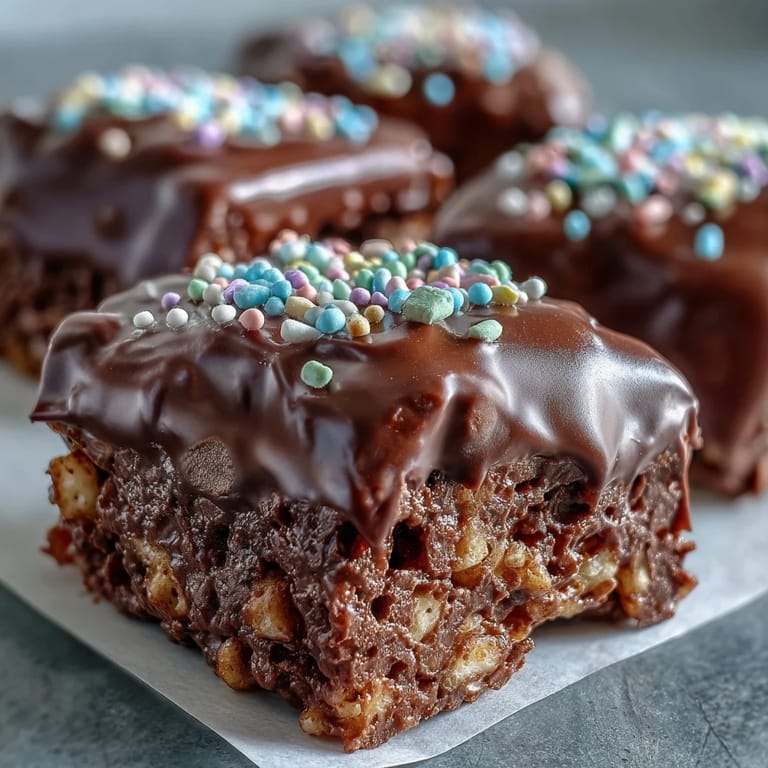
- Rainbow sprinkles or chopped nuts: Optional but joyful—they add color, crunch, and a little magic to the final look.
Tired of Takeout? 🥡
Get 10 meals you can make faster than delivery arrives. Seriously.
One email. No spam. Unsubscribe anytime.
Instructions
- Prep your pan:
- Grease that 8x8 or 9x9 inch pan generously with butter, even the corners. If you have parchment paper, line it for easy lifting later.
- Melt the butter:
- Set your saucepan over low heat and let the butter melt slowly, stirring so it doesn't brown. You want it liquid and golden, not browned or burnt.
- Add marshmallows:
- Tip in the mini marshmallows and stir constantly until they melt into a smooth, glossy cloud. This takes about 3 to 5 minutes, and patience here is everything.
- Season and remove:
- Pull the pan off the heat and stir in the sea salt if using. The residual heat will keep everything fluid for the next step.
- Fold in cereal:
- Pour in the Rice Krispies and fold gently with a spatula until every piece is coated in that sticky marshmallow blanket. Don't crush the cereal—keep it airy.
- Press into pan:
- Scrape the mixture into your prepared pan and press it down firmly with a buttered spatula or your buttered hands. Even pressure means even bars.
- Let it rest:
- Give the base about 10 minutes at room temperature to firm up just enough to hold the chocolate. You'll feel it set when you press lightly.
- Melt the chocolate:
- Combine chocolate chips and oil in a microwave safe bowl, then heat in 30 second bursts on medium power, stirring after each. Stop when it's just melted and glossy.
- Pour and spread:
- Drizzle the melted chocolate over the cereal layer, then use an offset spatula or the back of a spoon to spread it edge to edge. Work quickly before it starts to set.
- Add toppings:
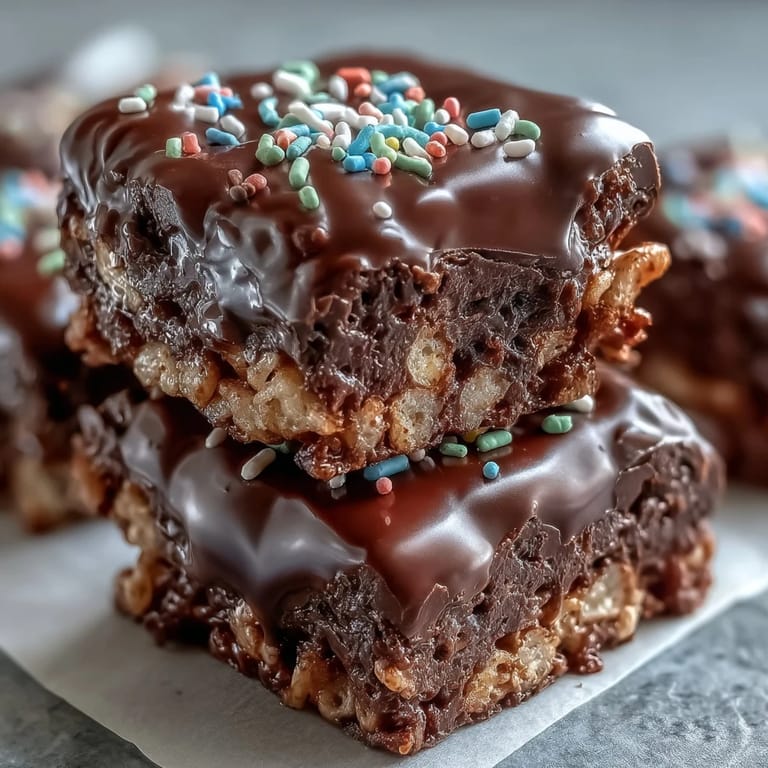
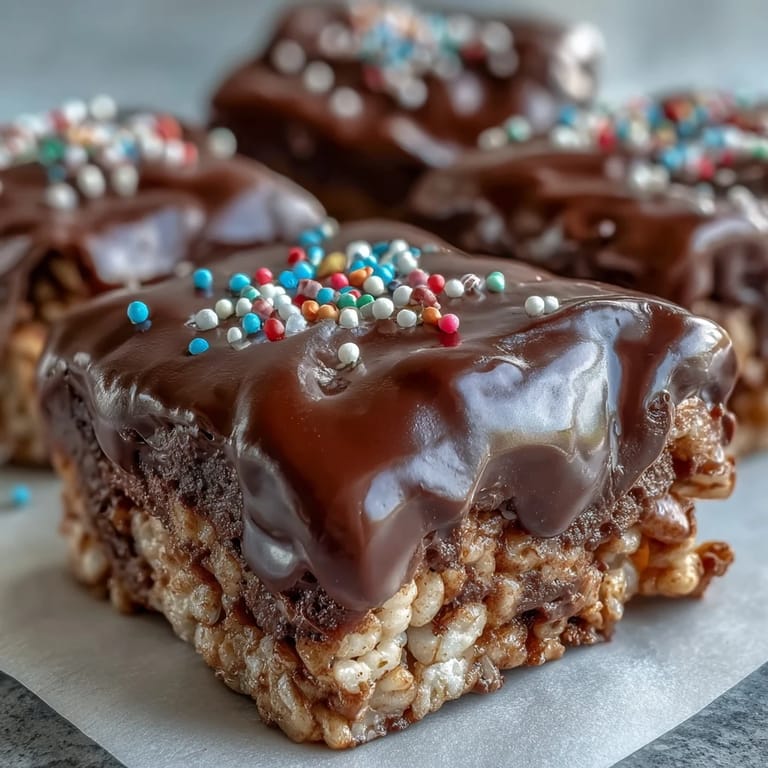
- Scatter sprinkles or chopped nuts immediately while the chocolate is still wet. They'll stick perfectly and add that final pop of color.
- Set completely:
- Let the treats sit at room temperature for at least an hour, or refrigerate for 20 to 30 minutes if you're in a hurry. The chocolate should be firm to the touch.
- Cut into bars:
- Lift the whole block out using the parchment, or invert it onto a cutting board. Use a sharp knife to cut into 12 to 16 bars, wiping the blade between cuts for clean edges.
 Save Pin
 One rainy Saturday, my daughter and I made a double batch and spent the afternoon wrapping them in wax paper tied with ribbon. We delivered them to neighbors, and the smiles we got back were worth every sticky finger and chocolate smudge. That day, these treats became more than dessert—they became our little way of spreading sweetness when the world felt heavy.
How to Store and Keep Them Fresh
I learned the hard way that leaving these uncovered overnight turns the chocolate dull and the cereal soft. Now I always stack them in an airtight container with parchment between layers, and they stay snappy for up to three days on the counter. If you want them to last a week, tuck them in the fridge, but let them sit out for a few minutes before serving so the chocolate isn't rock hard. Freezing works too—wrap each bar individually and thaw at room temperature for the best texture.
Flavor Twists Worth Trying
After making the classic version a dozen times, I started experimenting. White chocolate with dried cranberries and orange zest became my holiday favorite, while dark chocolate with sea salt flakes felt elegant enough for a dinner party. My nephew requested a peanut butter swirl once, so I melted peanut butter chips with the chocolate and drizzled both over the top. Each variation taught me that the base is forgiving—you can play with toppings, mix ins, and coatings without losing that essential crunch.
Serving Ideas and Presentation
I've served these at birthday parties, packed them in lunchboxes, and stacked them on dessert tables next to fancy cakes. They never look out of place. For a polished look, I cut them into small squares and arrange them on a platter with fresh berries tucked around the edges. Sometimes I wrap individual bars in cellophane and tie them with twine for party favors—guests love a treat they can take home.
- Dust with edible gold or silver for a celebratory touch.
- Drizzle with melted white chocolate in a zigzag pattern before the dark chocolate sets.
- Cut into small bites and serve them alongside coffee or hot cocoa.
 Save Pin
 Every time I pull these out of the pan and see that glossy chocolate top scattered with sprinkles, I feel a little burst of pride. They're simple, yes, but they're also proof that the best treats don't need to be complicated to make people happy.
Recipe Help & FAQs
- → Can I use white chocolate instead?
White chocolate works beautifully and creates a striking contrast. Melt it the same way as dark chocolate using the oil method for smooth, pourable consistency.
- → How should I store these treats?
Keep in an airtight container at room temperature for up to 3 days. For longer storage, refrigerate up to a week—though the chocolate may lose some of its glossy sheen from condensation.
- → Why did my marshmallows seize up?
This usually happens from overheating. Always melt butter and marshmallows over low heat, stirring constantly. If the mixture becomes stiff, a splash of milk can help smooth it out.
- → Can I make these gluten-free?
Use certified gluten-free crispy rice cereal, as traditional Rice Krispies contain barley malt. All other ingredients are naturally gluten-free.
- → What's the best way to cut clean bars?
Let the chocolate set completely at room temperature or briefly in the fridge. Use a sharp knife warmed under hot water and wiped dry between cuts for clean edges.
- → Can I add mix-ins to the cereal base?
Absolutely. Fold in crushed cookies, chopped nuts, or even mini chocolate chips before pressing into the pan. Just keep additions to about ½ cup total to maintain proper structure.