 Save Pin
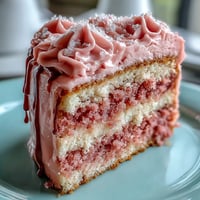
 My daughter discovered Cookie Run Kingdom one rainy afternoon, and suddenly our kitchen became headquarters for recreating every treat from the game. These milk cookies caught her eye immediately, so I set out to nail that delicate, almost ethereal texture she kept describing. The first batch came out too cakey, the second too fragile, but somewhere between patience and a few happy accidents, we found the sweet spot that made her eyes light up. Now they're the cookies we make when we want something special, something that tastes like both childhood wonder and homemade comfort.
I'll never forget the morning I made these for my neighbor's book club. She'd mentioned craving something sweet but not heavy, and these hit that mark perfectly. Watching her bite into one with that first moment of surprise, then satisfaction, made the whole effort worthwhile. They disappeared before the meeting even started, and I've been making double batches ever since.
Ingredients
- All-purpose flour (2 cups): This is your foundation, so make sure it's measured correctly by spooning and leveling rather than scooping directly from the bag.
- Unsalted butter (3/4 cup total): Use truly softened butter at room temperature so it creams properly and creates that light, delicate crumb.
- Granulated sugar (2/3 cup): This sweetens the cookies while keeping them tender and just barely crispy at the edges.
- Egg (1 large): The binding agent that holds everything together without making the cookies dense or heavy.
- Milk (3 tablespoons total): A touch of milk adds moisture and a subtle richness that elevates these from ordinary to memorable.
- Vanilla extract (2 teaspoons): Don't skip this or use imitation; real vanilla makes these taste homemade in the best way.
- Baking powder (1/2 teaspoon): Just enough lift to keep the cookies light and delicate without making them cakey.
- Salt (1/4 teaspoon): A pinch of salt balances the sweetness and makes every flavor pop.
- Powdered sugar (1 cup, sifted): Sifting removes lumps so your cream filling stays silky and spreads like a dream.
Tired of Takeout? 🥡
Get 10 meals you can make faster than delivery arrives. Seriously.
One email. No spam. Unsubscribe anytime.
Instructions
- Get your oven ready:
- Preheat to 350°F and line two baking sheets with parchment paper so your cookies don't stick and bake evenly. This takes just a few minutes but makes cleanup infinitely easier.
- Mix your dry ingredients:
- Whisk together flour, baking powder, and salt in a bowl, breaking up any lumps in the flour as you go. This prevents overmixing later and ensures even distribution of the leavening agent.
- Cream butter and sugar:
- Beat softened butter and sugar together until it looks pale and fluffy, about 2 to 3 minutes with an electric mixer. You'll know it's ready when it increases in volume and looks almost mousse-like.
- Add the wet ingredients:
- Beat in the egg, milk, and vanilla extract until everything is combined and smooth. Don't overmix at this stage, just mix until you don't see streaks of egg anymore.
- Bring the dough together:
- Gently fold in the dry ingredients using a spatula or the mixer on low speed until you have a soft, cohesive dough. Stop as soon as you don't see dry flour anymore to keep the cookies tender.
- Shape and flatten:
- Roll dough into 1-inch balls, place them 2 inches apart on your prepared sheets, then gently flatten each with your palm or the bottom of a glass to about 1/4-inch thickness. Work gently so the cookies stay delicate rather than tough.
- Bake until golden:
- Bake for 10 to 12 minutes, watching carefully so the edges just turn golden while the centers stay pale. They'll feel almost too soft when hot, but they'll firm up as they cool.
- Cool completely:
- Let the baked cookies cool on the baking sheet for a few minutes, then transfer to a wire rack to cool completely before filling. Warm cookies will make your cream filling melt, so patience is essential here.
- Make the cream filling:
- Beat softened butter until smooth, then gradually add sifted powdered sugar while beating, alternating with milk and vanilla until you reach a fluffy, spreadable consistency. This should take about 2 to 3 minutes and will look almost like frosting.
- Assemble the sandwiches:
- Spread or pipe about 1 tablespoon of cream filling onto the flat side of half your cookies, then top each with another cookie, flat side down, to create little sandwiches. Press gently so the filling spreads to the edges without squishing out.
 Save Pin
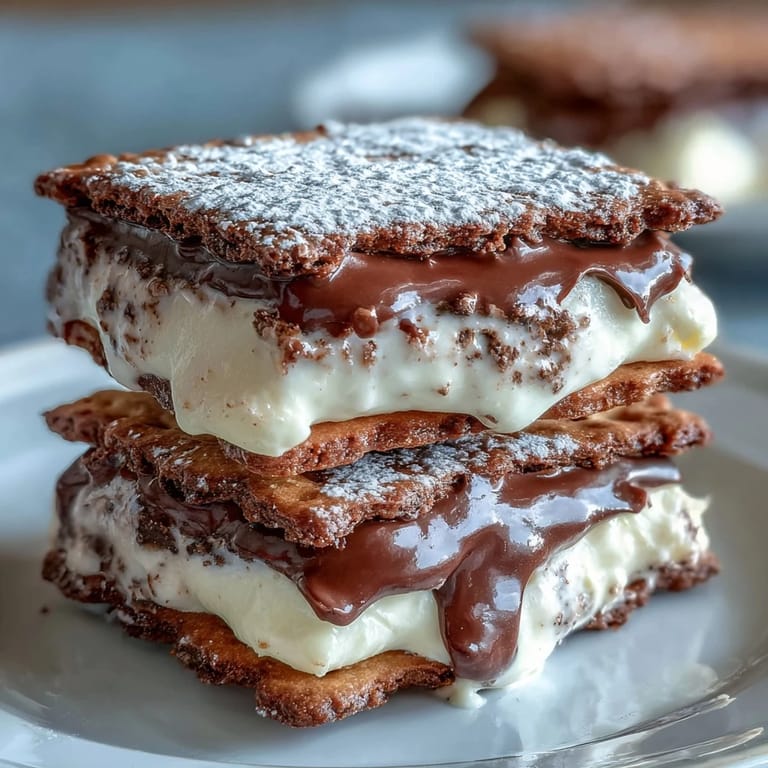
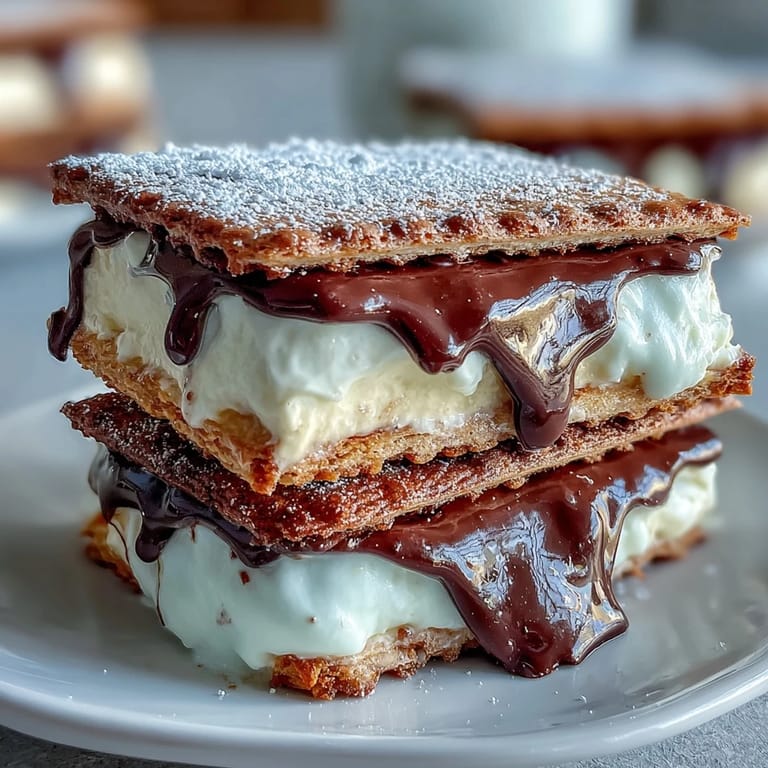
 There's something magical about handing someone a plate of these cookies and watching their face change. It's that moment when they realize homemade doesn't have to be complicated or time-consuming. My kitchen smells like vanilla and butter when I make these, and that scent alone has become a comfort signal for everyone in my house.
The Secret to Perfect Texture
The key to these cookies tasting like something from a specialty bakery is understanding that delicate doesn't mean fragile. These cookies should be sturdy enough to hold a generous amount of filling without cracking, but soft and tender when you bite into them. The trick is watching the edges carefully during baking, because that golden-brown edge is what gives you that contrast between tender cookie and crispy exterior. I learned this after my first batch came out like hockey pucks, and once I adjusted my baking time by just two minutes, everything changed.
Making These Ahead
You can actually make the unfilled cookies up to two days ahead, storing them in an airtight container at room temperature, which makes assembly day so much easier. The cream filling is best made within a few hours of serving to keep it fresh and fluffy, but you can prepare it in the morning and refrigerate it until you're ready to assemble. The finished sandwiches keep well for about three days, though I've never had them last that long because they disappear so quickly.
Creative Variations Worth Trying
Once you master the basic recipe, the possibilities open up in the most delightful ways. I've experimented with everything from adding almond extract alongside the vanilla to swirling a tiny bit of food coloring into the cream filling for a subtle pink hue. The base recipe is forgiving enough to handle these personal touches, and that's part of what makes it so fun to return to again and again.
- Add 2 tablespoons of unsweetened cocoa powder to the cookie dough for a chocolate version that pairs beautifully with vanilla cream.
- Dip the edges of the finished sandwiches in sprinkles or crushed candy for a festive look that matches the Cookie Run Kingdom aesthetic.
- Experiment with different extracts like peppermint, almond, or coconut in the filling to create your own signature version.
 Save Pin
 These cookies remind me that the best recipes aren't always about complexity or long ingredient lists. They're about those moments of pure joy when something homemade becomes someone's favorite thing to reach for.
Recipe Help & FAQs
- → What ingredients give the cookies their softness?
Butter, sugar, and milk in the dough contribute to a tender, soft texture after baking.
- → How is the vanilla cream filling prepared?
The filling is made by beating softened butter with powdered sugar, milk, and vanilla extract until fluffy and smooth.
- → Can the cookies be stored for later enjoyment?
Yes, store the sandwich cookies in an airtight container for up to three days to maintain freshness.
- → What baking temperature and time are recommended?
Bake the cookies at 350°F (175°C) for 10 to 12 minutes until edges are lightly golden.
- → Are there any optional variations for flavor?
Adding cocoa powder to the dough creates a chocolate twist, and decorating edges with sprinkles adds a festive touch.