 Save Pin
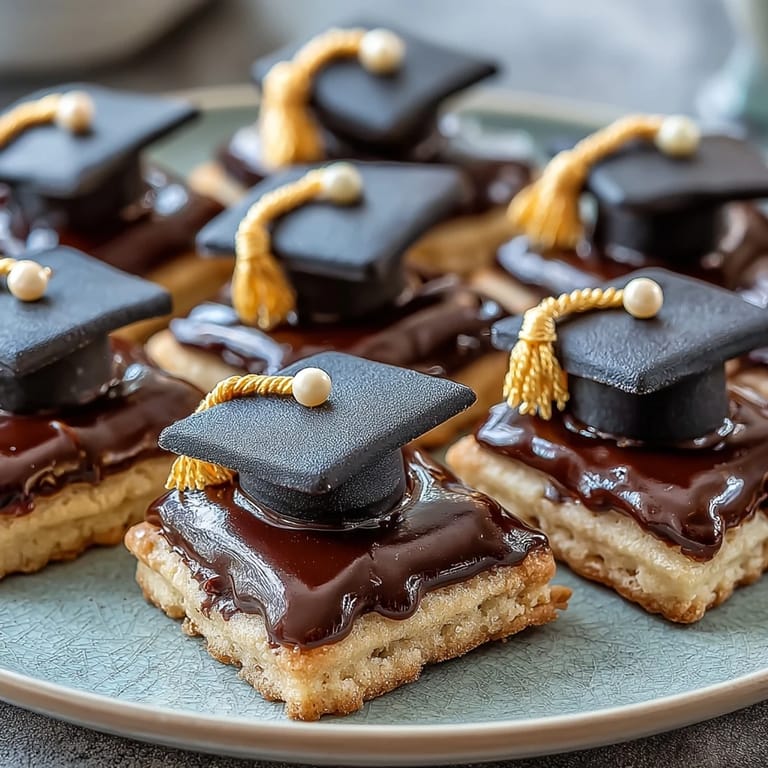
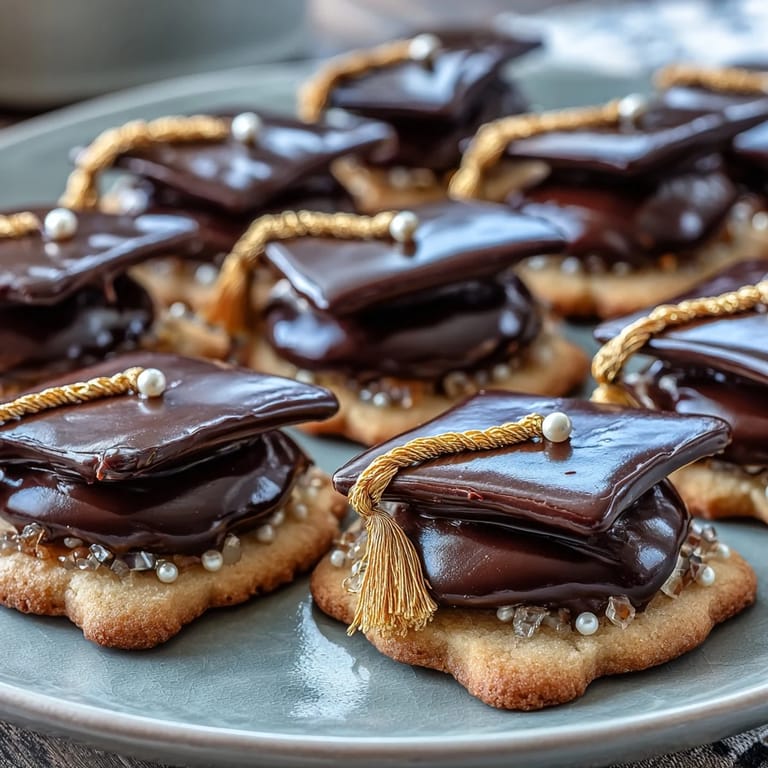
 My cousin texted me at midnight asking if I could make graduation cap cookies for her daughter's party the next afternoon. I'd never made them before, but something about the challenge—turning a simple sugar cookie into a little hat—felt right for the occasion. Three hours later, I was elbow-deep in royal icing, laughing at my first attempt that looked more like a blob than a cap, but by the end of the night, I had 24 tiny edible mortarboards lined up like they were marching across my countertop.
Watching the birthday girl's face when she saw the little black caps with yellow tassels made every minute of piping feel worthwhile. Her friends instantly started snapping photos before eating them, which I think says everything about how these cookies turn out.
Ingredients
- All-purpose flour (2 1/2 cups): The foundation of a crisp, buttery cookie—don't sift unless your flour is really packed down.
- Unsalted butter (3/4 cup), softened: Softening it properly at room temperature makes the creaming step so much easier and gives you a fluffier dough.
- Granulated sugar (1 cup): This is what creates that light, tender crumb that makes these cookies snap when you bite them.
- Baking powder (1/2 teaspoon): Just enough to give the cookies a slight lift without making them cake-like.
- Large egg and vanilla extract (1 egg, 2 teaspoons): These bind everything together and add richness that keeps the cookies tasting homemade.
- Powdered sugar (3 cups), sifted: Lumps in powdered sugar will absolutely ruin your icing, so take the 30 seconds to sift it.
- Egg whites or meringue powder (2 egg whites or 4 tablespoons meringue powder plus 6 tablespoons water): The secret to glossy, pipeable royal icing—meringue powder is safer if you're worried about raw eggs.
- Black and yellow gel food coloring: Gel colors are worth it because they don't thin out the icing like liquid colors do.
- Mini yellow M&Ms or candy pearls: These become your tassel finish and add that perfect little pop of color.
Tired of Takeout? 🥡
Get 10 meals you can make faster than delivery arrives. Seriously.
One email. No spam. Unsubscribe anytime.
Instructions
- Mix your dry ingredients:
- Whisk the flour, baking powder, and salt together in a bowl and set aside. This distributes the leavening evenly so your cookies bake consistently.
- Cream butter and sugar:
- Beat them together until the mixture is pale and fluffy, which usually takes about 2 to 3 minutes with an electric mixer. You'll know it's ready when it looks almost like frosting.
- Add the egg and vanilla:
- Mix these in until they're completely incorporated, scraping down the bowl as you go. The mixture should be smooth and creamy.
- Bring the dough together:
- Gradually add your flour mixture, mixing on low speed until just combined—don't overmix or your cookies will be tough. Divide the dough in half, shape into disks, wrap in plastic, and chill for 30 minutes.
- Roll and cut:
- Preheat your oven to 350°F. On a lightly floured surface, roll the dough to 1/4-inch thickness and cut into graduation cap or square shapes. The thickness matters here because too thin and they'll bake too fast and burn at the edges.
- Bake until golden:
- Place cookies on parchment-lined baking sheets and bake for 8 to 10 minutes—watch for just a hint of golden color at the edges. Let them cool completely on the pan before decorating.
- Make your royal icing:
- Beat the egg whites or meringue powder mixture until foamy, then gradually add sifted powdered sugar, beating until stiff, glossy peaks form. Stir in vanilla, then divide the icing and tint most of it black with gel coloring and a small portion yellow.
- Adjust the consistency:
- Add water by the teaspoon if you need a thinner icing for flooding, or add more powdered sugar if you need it thicker for piping. Think honey-like for flooding, and toothpaste-like for piping.
- Outline and flood:
- Pipe a thin black outline around each cookie, then fill the center with black icing that's slightly thinner. Use a toothpick to gently nudge the icing toward the edges and let it set for 30 to 60 minutes.
- Add the tassel details:
- Once the black is fully dry, pipe a small yellow shape in one corner to represent the tassel and button of the cap. Top it with a mini M&M or candy pearl and let everything dry completely before serving or packaging.
 Save Pin
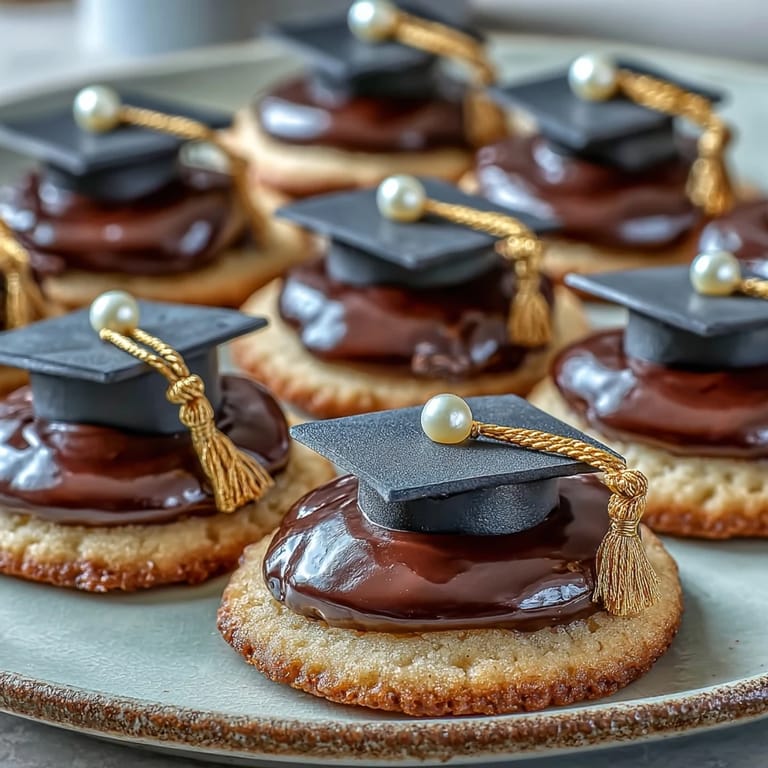
 There's something almost meditative about piping tiny tassels onto 24 little caps, one after another. By the time I finished, my hand was tired but my heart was full knowing these cookies would be part of someone's graduation memory.
Baking Timing and Planning
The beauty of this recipe is that it doesn't demand everything happen at once. I baked my cookies two days before the party, stored them in an airtight container, and decorated them the morning of the event when I had fresh energy and focus. The dough can be made and chilled the night before you plan to roll and bake, which breaks the whole process into manageable chunks.
Working with Royal Icing
Royal icing has a reputation for being finicky, but honestly it's just about respecting its temperament. If your icing is too thick, a tiny splash of water fixes it; if it's too thin, a little more powdered sugar brings it back. Temperature matters too—keep it covered with a damp cloth while you work so it doesn't dry out and start forming a crust on the surface.
Decoration Techniques and Tricks
The first few cookies I decorated looked wonky because I was overthinking it, but by cookie number six I'd found my rhythm. The toothpick is your best friend here—use it to smooth out drips, guide the icing toward corners, and fix little imperfections before everything sets. If you mess up a section, you can scrape it off with a paring knife while it's still soft and try again.
- Keep paper towels nearby and wipe your piping bag frequently so old icing doesn't interfere with clean lines.
- Piping bags fitted with small round tips give you the control you need for both outlines and tassel details.
- Let each color dry before moving to the next one, even though it feels like it's taking forever.
 Save Pin
 These cookies prove that celebration food doesn't have to be complicated—just thoughtful and made with a little care. Whether you're marking a graduation, a promotion, or just a really good week, these little caps are your edible confetti.
Recipe Help & FAQs
- → What ingredients create the cookie base?
The cookie base combines all-purpose flour, baking powder, salt, unsalted butter, granulated sugar, egg, and vanilla extract for a crisp, buttery texture.
- → How is the royal icing prepared?
Royal icing is made by beating egg whites or meringue powder with powdered sugar and vanilla extract until stiff peaks form, then tinted with gel food colors.
- → What shapes are these cookies cut into?
The dough is rolled thin and cut using a graduation cap or square cutter, crafting a classic cap silhouette for each cookie.
- → How long should cookies cool before decorating?
Cookies should cool completely after baking to ensure the icing sets properly without melting or sliding.
- → What decorations finish these cookies?
They are decorated with black royal icing outlines and floods, yellow tassels piped on top, and mini candies or pearls to replicate tassel details.
- → Can the icing be prepared ahead of time?
Yes, royal icing can be made in advance and stored, which helps streamline the decorating process on baking day.